
Automating your VRBO rental with Zapier and Smart Things: Part 3
In our previous posts we've covered our motivations and a majority of the Zapier zaps needed to do our automation. In this post, we setup our custom Smart Things smart app manage our lock codes and our final Zap to call it.
Smart Things
The smart things integration requires three things:
- Smart App creation
- Personal access code creation
- Smart App installation
Smart App Creation
Do the following to get the smart app setup:
- Login to the SmartThings IDE at https://graph.api.smartthings.com. Create a login if you don't have one AND don't forget to opt-in for the developer account. To verify that you're logged into the correct location, after logging into the above link, click on My Locations and then click on the name of the location where you want to install the SmartApp. Note: You may be asked to log into your account again when you click on your location, if so login again.
- Click on "My SmartApps"
- Click on "+New SmartApp" on the top right
- Click "From Code"
- Copy the code from Github into the code area.
- Click "Create"
- Click "Publish" and then "For me" on the top right
- After clicking "Publish", click on the "App Settings" button next to the Publish button
- Scroll down and click on "OAuth" to expand the section
- Click on "Enable OAuth in Smart App" (it will create it create a ID and Secret)
- Click on "Update" at the bottom of the page
Personal Access Code Creation
Now, we need to get our installation ID and access code for accessing our webhook.
- Go to https://account.smartthings.com/tokens
- Click Generate New Token
- Give it a name, be sure to check Devices and Schedules
- Click Generate Token
- On the resulting page, be sure to note the token value. It will be a long string of letters and numbers. You'll need this and can't see it again after this, so save it someplace.
Smart App Installation
No we need to install our Smart App to our location/device.
- Open your SmartThings Classic App on your phone, click on the Automation icon at the bottom bar right corner of the main screen. Now click on the "SmartApps" tab on the top right of the screen. Scroll down to the bottom and click on "+Add a SmartApp". Then scroll down to the bottom and click on "My Apps" section and click it.
- Scroll down the "My Apps" section until you see the new SmartApp you just created and click on it on install it. You're done! To open/configure the app in future follow step 14.
- After installing the SmartApp, configure/open it by clicking on the "Automations" icon and then click on "SmartApps" on your phone. NOTE: Clicking on the SmartApp in the "My Apps" section will install a NEW instance of the SmartApp instead of opening the existing installation.
Zap #5: Email Parser from Zapier to Webhook

Trigger: New Email
Just like Zap #4, our trigger is a new email to propertyalert@robot.zapier.com. We pull out all the same fields too.
Action: POST
The URL is determined by looking at the Automation tab in the SmartThings app on your phone and clicking on VacationLockManager (assuming that's what you called it). You should see something like this:
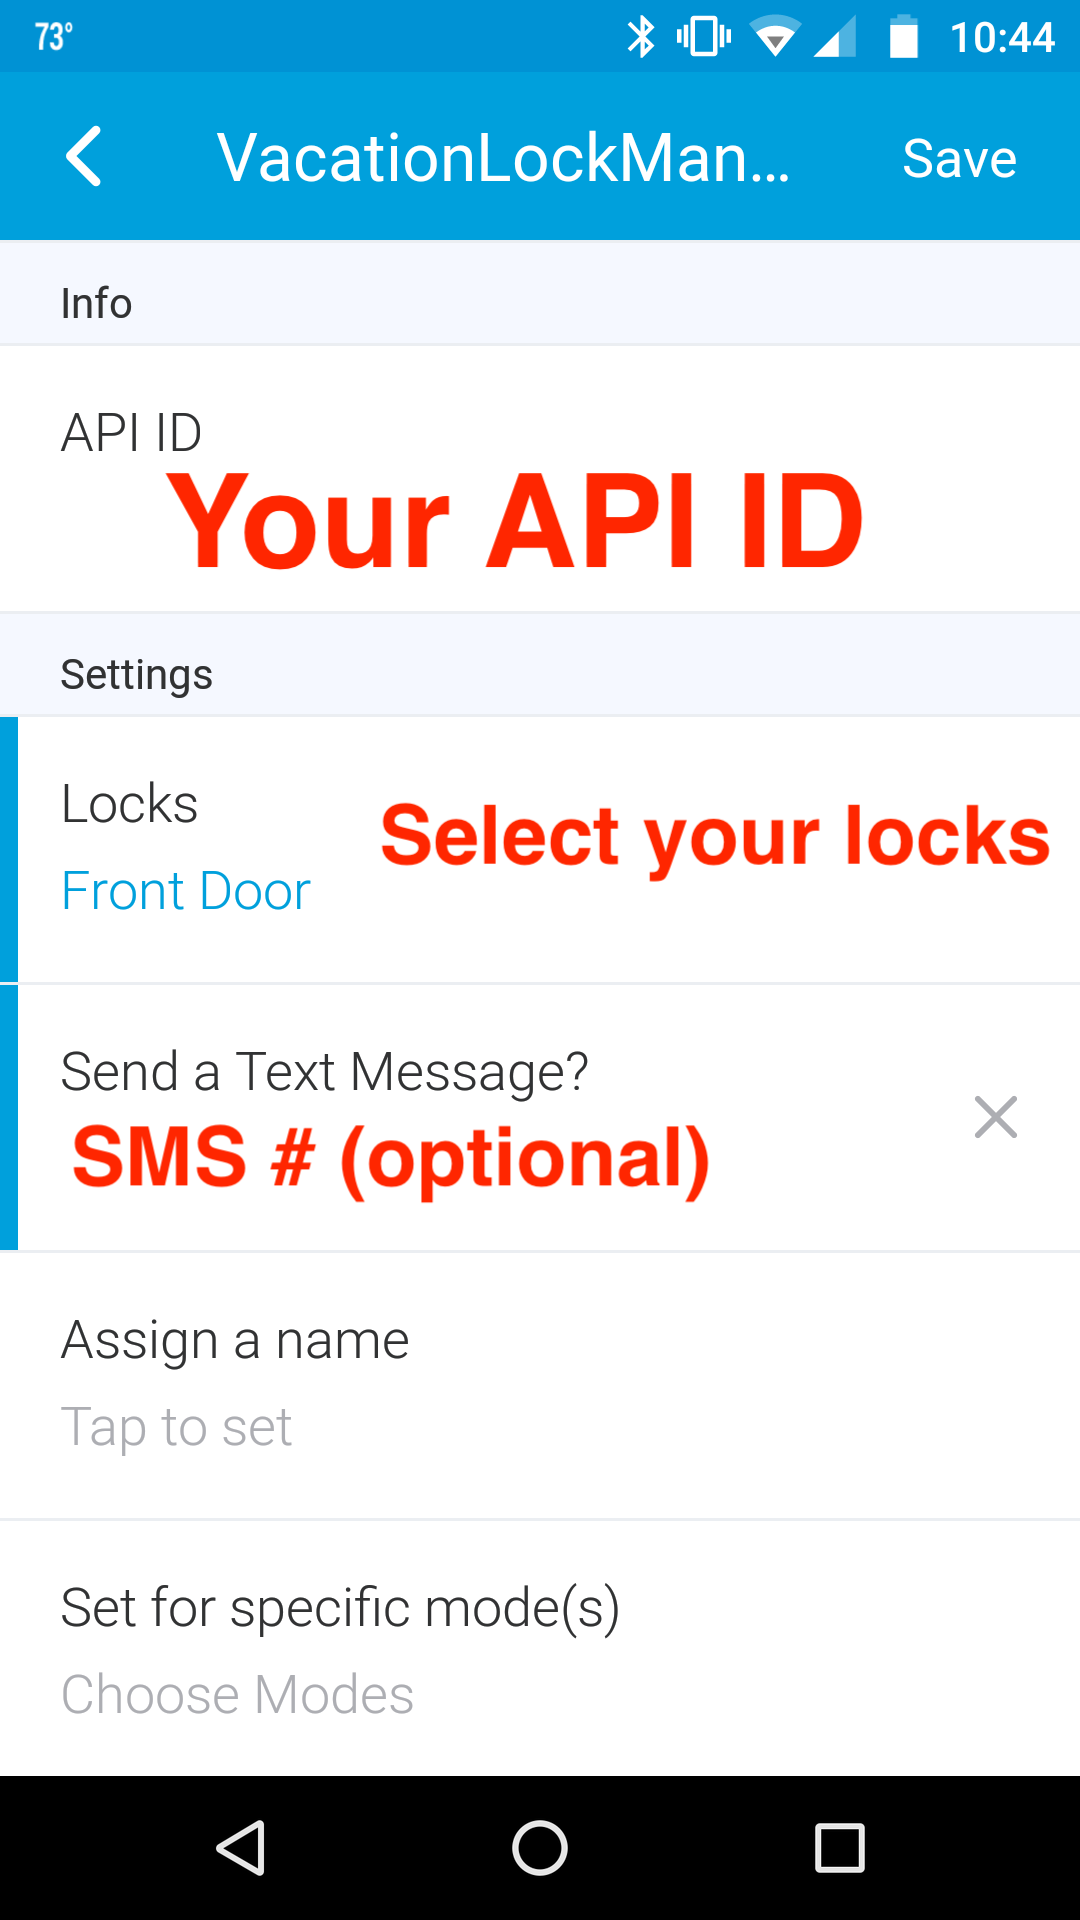
https://graph-na04-useast2.api.smartthings.com/api/smartapps/installations/<API-ID>/reservationSo your Zap looks something like this:
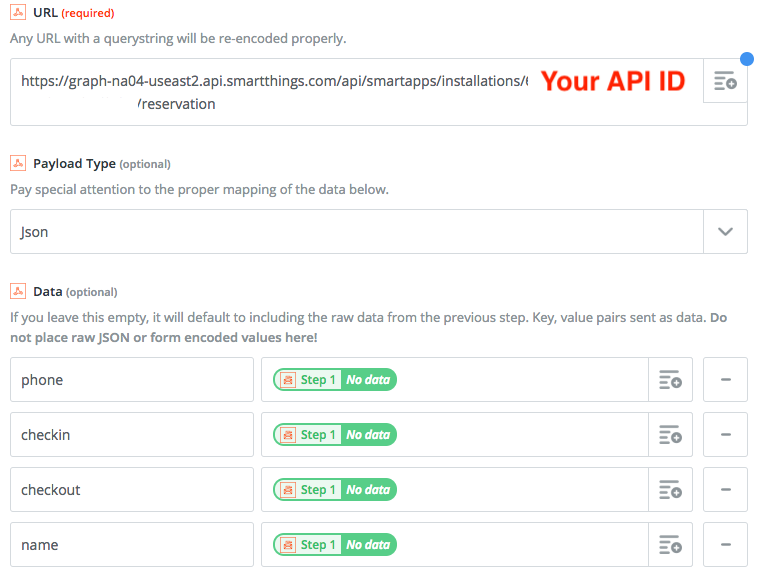
Down toward the bottom is one last thing to set, we need to add our personal token:

Go enable all your Zaps if you haven't already.
Alternative: RBoy Apps
If all this isn't working for you or is too complex, there is a commercial offering that may work for you. Have a look at http://smartthings.rboyapps.com/.