

Using Cloudflare to increase analytics accuracy
My previous CloudFlare post talked about how to use their proxy service to protect internal devices on your home LAN. In this post, I'll talk about how you can use their proxy service to mask a hosted analytics service to your own domain.
Why would I want to do this?
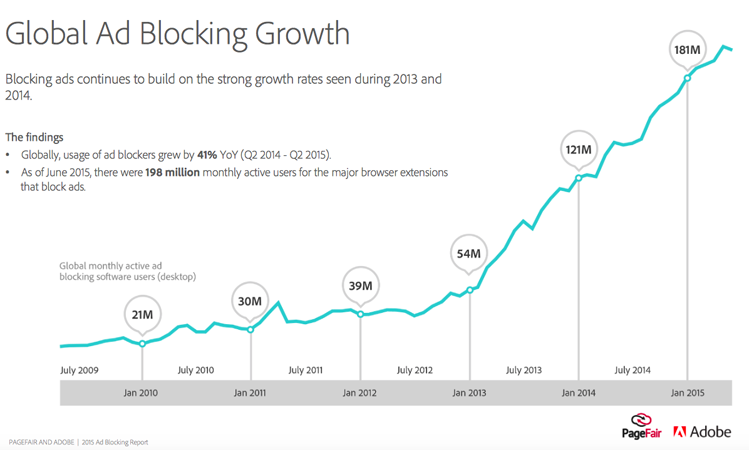
Somewhere between 30-60% of the visitors accessing your web site are using ad blockers. They work by keeping a big list of known ad servers and blocking traffic to them. This often includes analytics sites, such as google analytics and pretty much every commercial offering. By employing a proxy, you can regain visibility into this missing traffic!
But my analytics provider already lets me using my own domain name!
Sure, but this only helps with the blocking happening in newer browsers blocking third-party requests. It still doesn't help with people using DNS blocking, such as PiHole or NextDNS. That's because they just have you setup a CNAME on your domain that points to their domain. DNS solutions will still intercept and kill the request once that CNAME gets resolved.
How
We'll be setting up a proxy that will proxy traffic from stats.jonpoland.org to plausible.io. The method would probably work with other providers, with the caveats noted at the end. I've not tried other providers.
First, you'll need to be using CloudFlare for DNS on your domain. Sadly, you must use them for the entire domain, you can't delegate just a subdomain. In my examples, I'm using jonpoland.org.
Next, go to the Workers section, click Manage Workers. Then click Create Worker. I called mine plausible-proxy.
Next, put in this code for the function body:
const OLD_URL = "plausible.io"Note that you'll need to change the value of NEW_URL and OLD_URL at the top for your setup. What this does is intercepts all traffic sent to NEW_URL to OLD_URL. At the same time, it rewrite all the links that reference OLD_URL with NEW_URL. At this point, you can point your web browser to NEW_URL and you should see the OLD_URL website:
const NEW_URL = "plausible-proxy.jonpoland.workers.dev"
async function handleRequest(request) {
const url = newURL(request.url)
url.hostname = OLD_URL
const res = await fetch(url.toString(), request)
return rewriter.transform(res)
}
class AttributeRewriter {
constructor(attributeName) {
this.attributeName = attributeName
}
element(element) {
const attribute = element.getAttribute(this.attributeName)
if (attribute) {
element.setAttribute(
this.attributeName,
attribute.replace(OLD_URL, NEW_URL)
)
}
}
}
const rewriter = new HTMLRewriter()
.on("a", new AttributeRewriter("href"))
.on("img", new AttributeRewriter("src"))
addEventListener("fetch", event => {
event.respondWith(handleRequest(event.request))
})

Now, the last step is to change your tracking code to use your worker URL instead of the plausible URL. For example, change
<script async defer data-domain="plaus-test.netlify.app" src="https://plausible.io/js/plausible.js"></script>to be
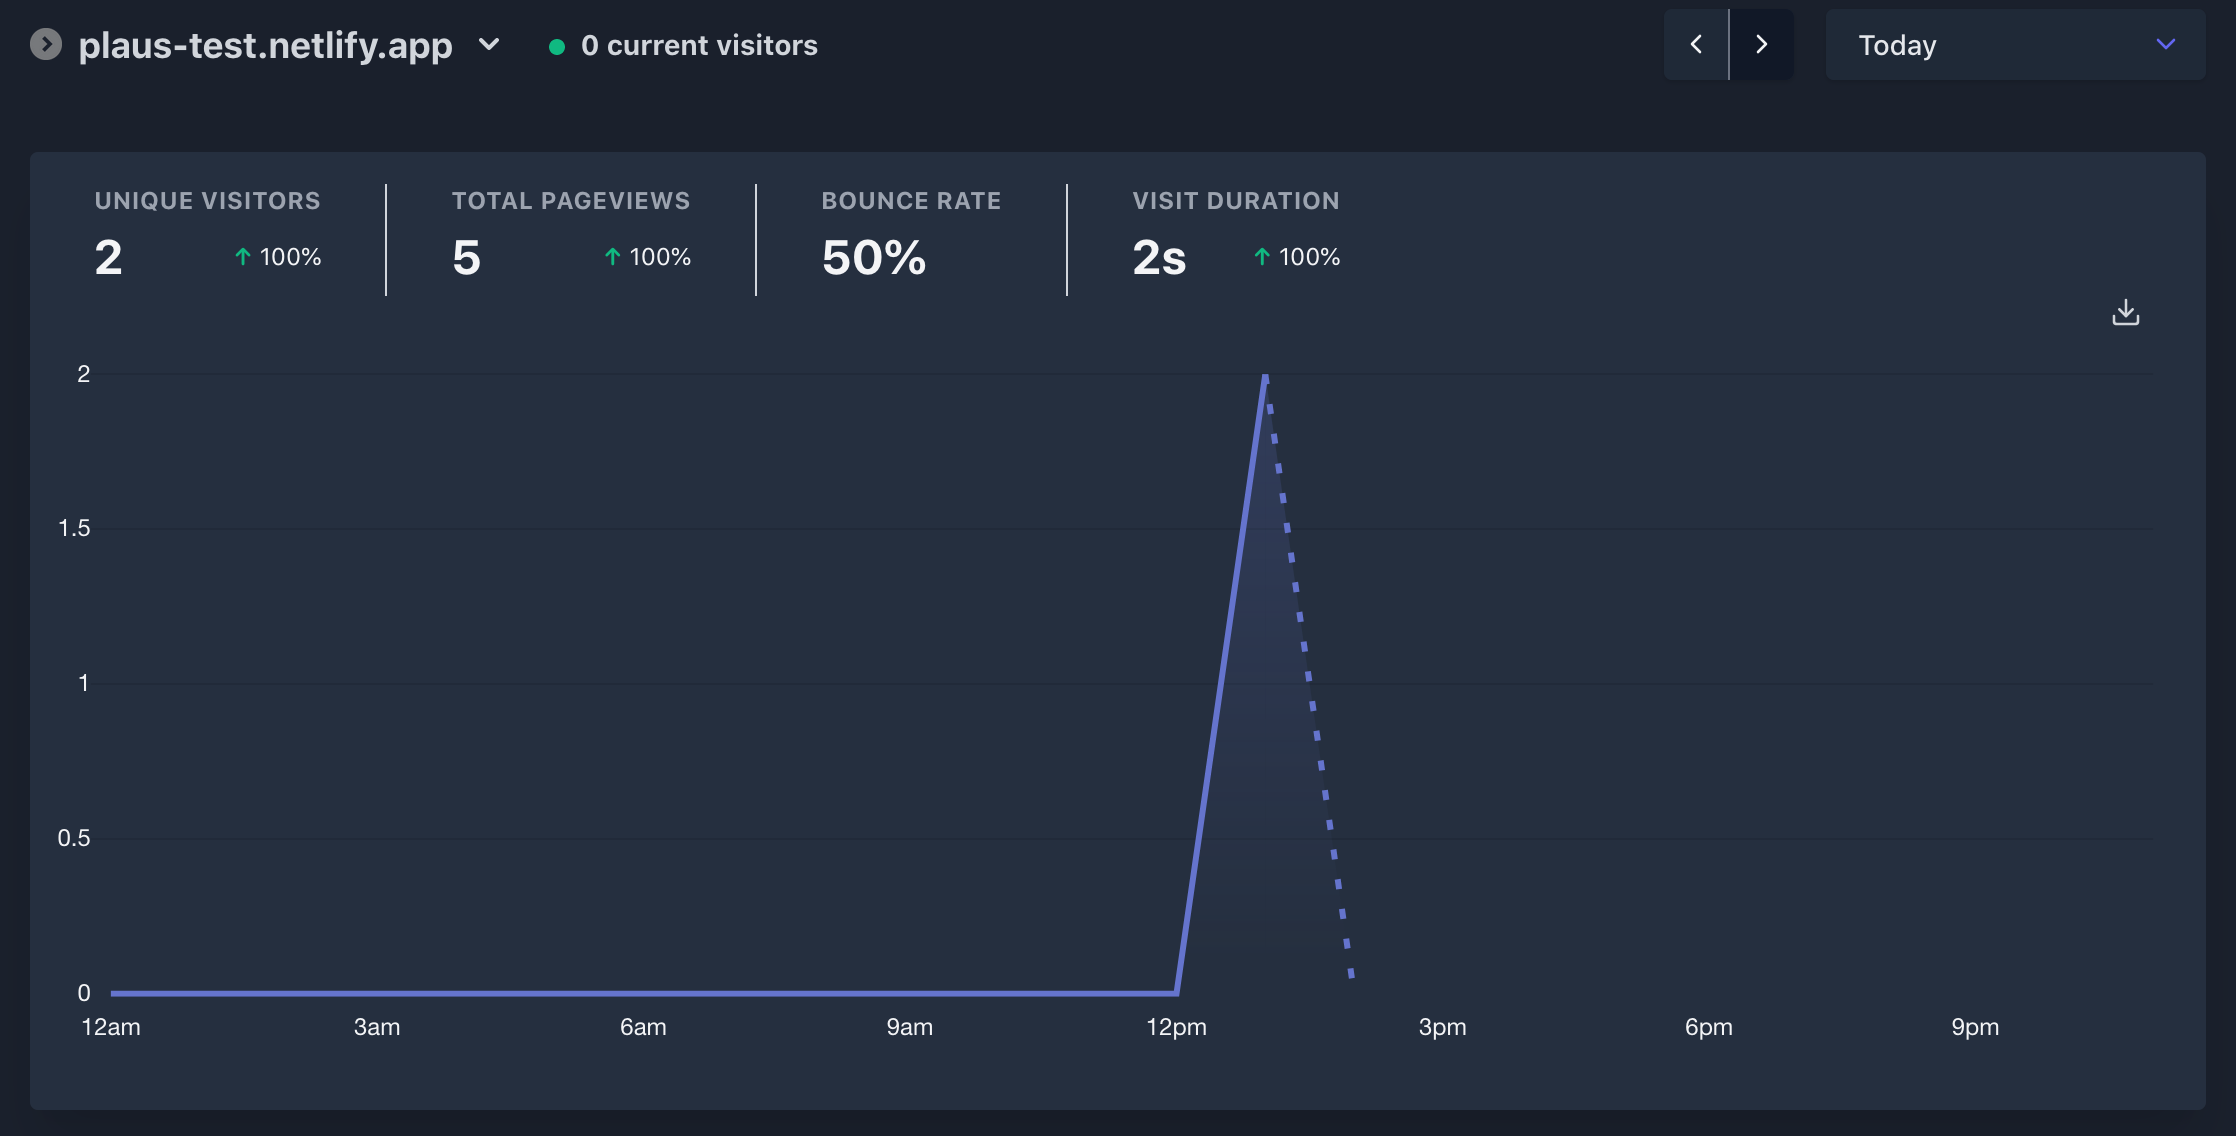
<script async defer data-domain="plaus-test.netlify.app" src="https://plausible-proxy.jonpoland.workers.dev/js/plausible.js"></script>That's it, you should now continue seeing data in your dashboard
Optional
You can simplify your URL and make it part of your domain by simple adding a Route and Alias in CloudFlare.
Click the DNS Tab and add a CNAME. I made mine stats and it points to my worker name.


Lastly, update your tracking URL on your site to be your CNAME instead of your worker URL.
Caveats
I'm sure not everything gets proxied. Country tracking, referrer tracking, and probably a few other things will likely get lost or skewed by the proxy. I did not look into this. As a result, this was a fun experiment, but for this and other reasons, probably best to stay just that.