

Improving IoT device security using Cloudflare
Many people run a few "internal" services on their home networks. I have a Raspberry Pi running Plex. A synology NAS running some docker containers and other things. Your router probably has a web interface, which hopefully isn't wide open to the outside world. My most recent need was to enable remote access to my chicken coop controller.
All of these devices, given their "internal" nature, don't use SSL. SSL is bound to DNS, and DNS typically doesn't apply to internal addresses. It's not impossible, but it's pretty cumbersome to get SSL to an internal service. So, connecting to these device is usually over HTTP and not secure.
Enter Cloudflare
CloudFlare is a service that started offering DDoS protection as a service. I've avoided using them for years, as they were a competitor at my previous company. Nowadays, they do a lot of things, in addition to DDoS. Many of the websites you use everyday use cloudflare. As evidenced by their recent outage last year that broke much of the Internet.
Cloudflare works by sitting in front of servers as a caching and control layer. From here, they can do DDoS protection, caching, security (WAF, etc), SSL termination, and more. For our interests, we only care about SSL termination and workers.
If you didn't use Cloudflare, you could do something like a VPN. Wireguard would work great. However, that's a little heavy, and not natively supported yet on my Edgerouter.
Setting up CloudFlare
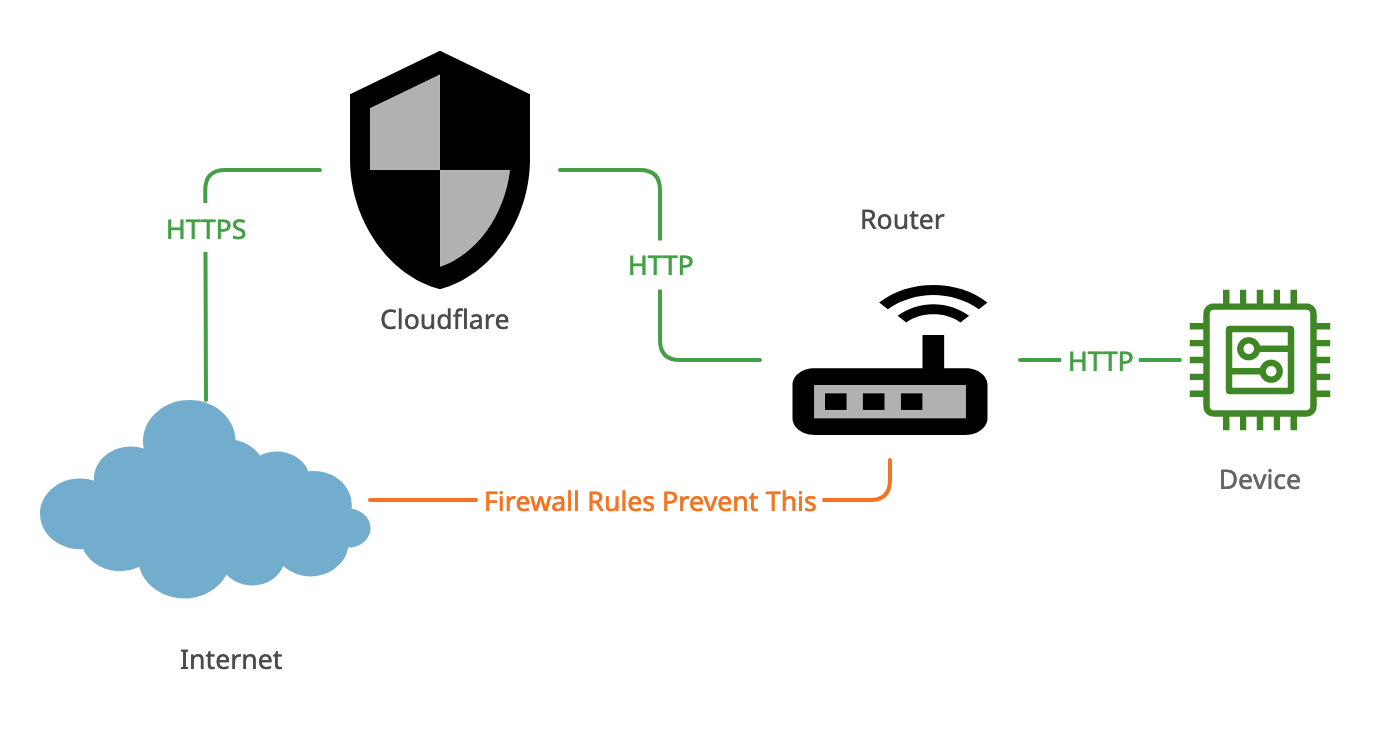
The diagram below shows how CloudFlare sits in front of your router to manage access to it.
Make CF account and setup domain
Sign up for a free CF account if you don't have one.

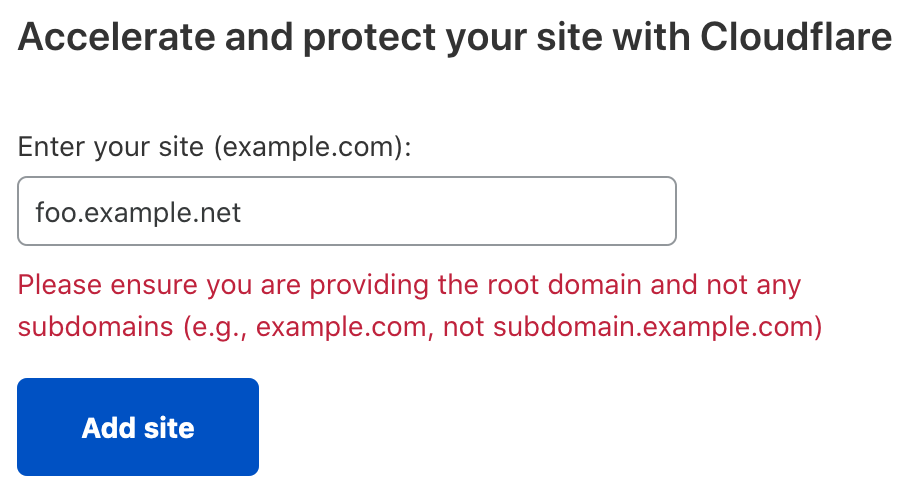
Add a domain. Unfortunately, this needs to be a top-level domain, it can't be a subdomain. Luckily, I happened to have a domain I didn't mind switching over.
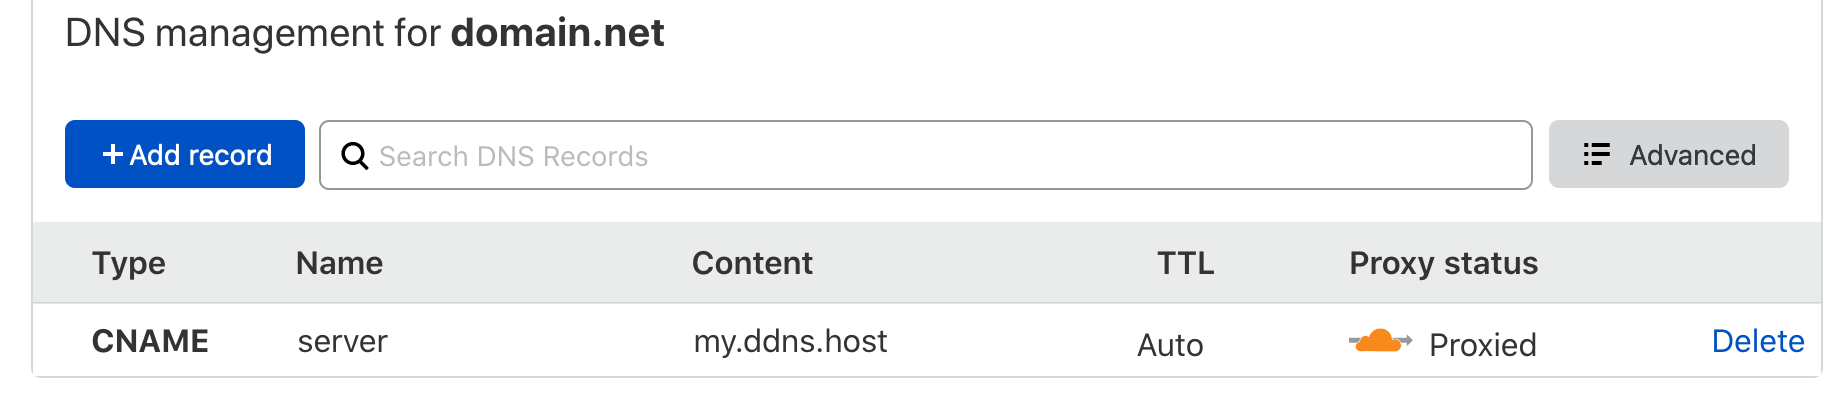
Next, add a CNAME. We assume DDNS solution for your router.
CloudfFlare will ask you to switch your nameservers to theirs. If you're using AWS (like me), checkout this link. Changing the NS record alone doesn't do it!
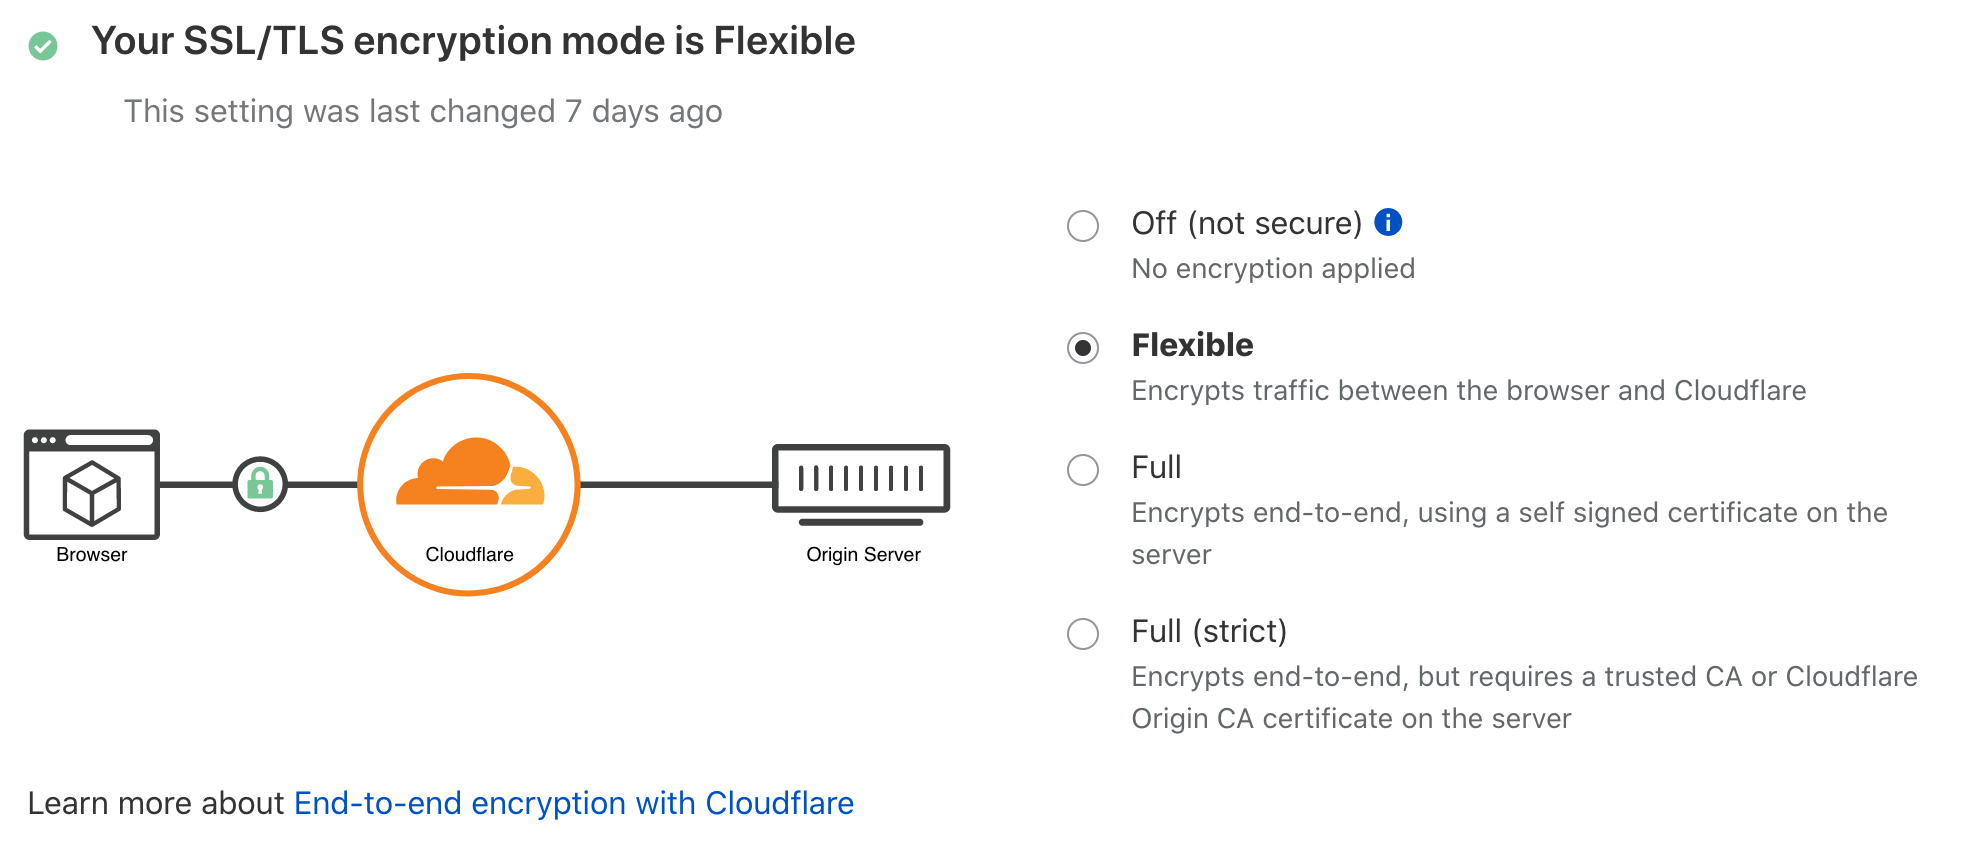
The last bit of configuration is to tell CloudFlare that your end host doesn't support HTTPS. You need to click on the SSL/TLS icon and change to Flexible.
Punch hole through firewall
You need to forward port 80 on your firewall to your internal host. For now, leave it wide open while we get CF setup.
Here's a good video how to do it for the Ubiquiti Edgerouter.
Add basic auth
So, now you can access your site remotely through CF and it has HTTPS.
To protect it with a password, we need to add some logic in CF. We do this with workers. Navigate to the workers page, create a new worker, and put this in for its script.
const NAME = "YOUR_USER_NAME"
const PASS = "YOUR_PASSWOED"

/**
 * RegExp for basic auth credentials
 *
 * credentials = auth-scheme 1*SP token68
 * auth-scheme = "Basic" ; case insensitive
 * token68     = 1*( ALPHA / DIGIT / "-" / "." / "_" / "~" / "+" / "/" ) *"="
 */

const CREDENTIALS_REGEXP = /^ *(?:[Bb][Aa][Ss][Ii][Cc]) +([A-Za-z0-9._~+/-]+=*) *$/

/**
 * RegExp for basic auth user/pass
 *
 * user-pass   = userid ":" password
 * userid      = *<TEXT excluding ":">
 * password    = *TEXT
 */

const USER_PASS_REGEXP = /^([^:]*):(.*)$/

/**
 * Object to represent user credentials.
 */

const Credentials = function(name, pass) {
  this.name = name
  this.pass = pass
}

/**
 * Parse basic auth to object.
 */

const parseAuthHeader = function(string) {
  if (typeof string !== 'string') {
    return undefined
  }

  // parse header
  const match = CREDENTIALS_REGEXP.exec(string)

  if (!match) {
    return undefined
  }

  // decode user pass
  const userPass = USER_PASS_REGEXP.exec(atob(match[1]))

  if (!userPass) {
    return undefined
  }

  // return credentials object
  return new Credentials(userPass[1], userPass[2])
}


const unauthorizedResponse = function(body) {
  return new Response(
    null, {
      status: 401,
      statusText: "'Authentication required.'",
      body: body,
      headers: {
        "WWW-Authenticate": 'Basic realm="User Visible Realm"'
      }
    }
  )
}

/**
 * Handle request
 */

async function handle(request) {
  const credentials = parseAuthHeader(request.headers.get("Authorization"))
  if ( !credentials || credentials.name !== NAME ||  credentials.pass !== PASS) {
    return unauthorizedResponse("Unauthorized")
  } else {
    return fetch(request)
  }
}

addEventListener('fetch', event => {
  event.respondWith(handle(event.request))
})
Test
Try and access your CF CNAME again, you should be prompted for a username and password. Do this from outside your LAN, for example from your cell phone with WiFi turned off. Almost there!
Tighten your firewall
Now that it's working, we still need to limit source ranges to the CF ips. Review this video again for how to do it for the Ubiquiti Edgerouter. This is what prevents the orange line bypassing CF in the first network diagram above.
Conclusion
This isn't bullet proof. In fact, I'd say it's only one step above security by obfuscation. I wouldn't use this for high value or highly capable assets. The only thing keeping your server from being wide open and bypassing the Cloudflare auth is firewall rules. It is possible for someone else to stand up their own worker, point it at your backend and be able to access your server. Firewalls are also notorious for being bypassed.